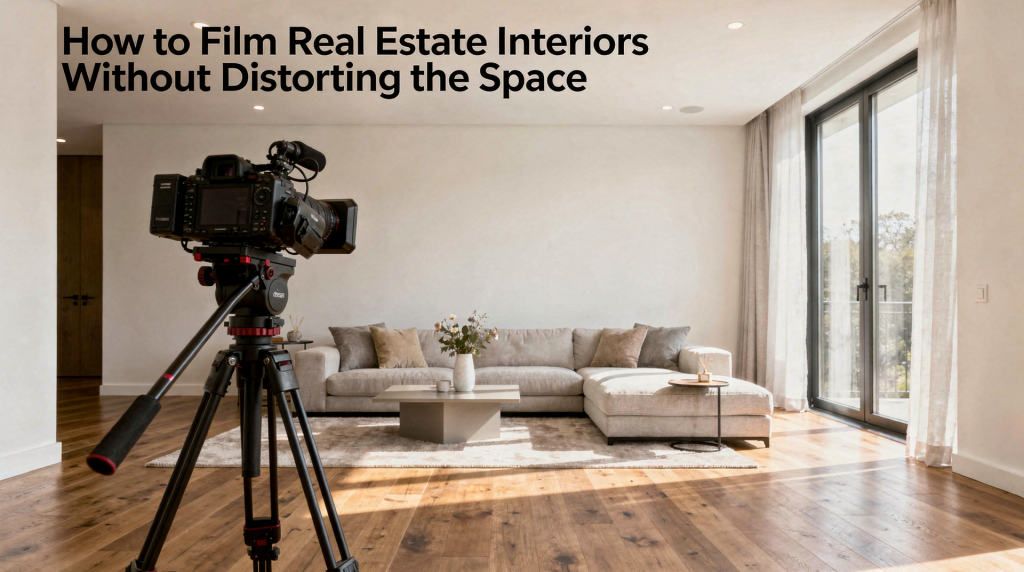
When I walk into a room with a camera, the first question is never “How wide can I go?” It’s “What does this space actually feel like?” That distinction separates a usable real estate video from one that misrepresents the property. Getting interiors right comes down to three practical controls: focal length, camera level, and perspective management—both on set and in post. The aim is to present rooms that feel honest, airy, and proportionally correct. Not stretched. Not compressed. Not like a carnival mirror.
Why distortion happens in interior video
Interior distortion usually traces back to one of two technical culprits: optical distortion from the lens itself, and geometric distortion from camera position. Lens distortion bends straight lines—especially near the edges of a frame shot on an ultra-wide. You’ll see doorframes bow outward, ceiling lines sag, or baseboards curve like a gentle parenthesis. Perspective distortion, on the other hand, comes from tilting the camera. Tilt up to include more ceiling, and vertical lines converge inward. Tilt down to emphasize flooring, and the room suddenly feels bottom-heavy, with furniture proportions sliding away from reality.
In my experience, it’s the second type—perspective distortion—that ruins more takes. A slightly tilted camera on a gimbal might feel dynamic outdoors, but indoors it makes walls lean, windows trapezoid, and the whole architecture feel unsettled. The human eye is remarkably sensitive to vertical alignment. If a doorframe isn’t plumb in the frame, the viewer may not consciously notice, but their sense of the room’s integrity will quietly erode.
The best focal length for real estate interiors
After a decade of shooting properties, I keep returning to a simple principle: the lens should serve the room, not overwhelm it. On full-frame sensors, the practical range for interior work sits between 16mm and 35mm, with most walk-through and establishing shots falling between 16mm and 24mm. That range offers enough width to show spatial relationships without warping the geometry beyond recognition.
| Scene type | Practical focal length range | Why it works |
|---|---|---|
| Tight bedroom or bathroom | 16–20mm full-frame equivalent | Fits confined spaces without pushing distortion to the edges; keeps vanity lines and headboards believable |
| Standard living room or kitchen | 18–24mm full-frame equivalent | Balances depth with natural proportions; avoids edge stretching on countertops and islands |
| Small detail shot or lifestyle corner | 24–35mm full-frame equivalent | Cleaner geometric fidelity; textures and material details feel more naturally weighted |
Push below 16mm and rooms start ballooning. Corners stretch, furniture near frame edges elongates, and the space reads as disorientingly large—a look that might work for a stylized music video but fails for listings. Go above 35mm in a tight room and the space collapses, feeling cramped and uninviting. Neither extreme helps a buyer or renter imagine themselves living there.
I often shoot on a 20mm prime for medium-sized rooms—it forces me to move and find the right composition rather than lazily zooming. That discipline pays off in frame integrity. The lens is wide enough to reveal spatial flow but rectilinear enough to keep cabinet lines crisp and honest.
Keep the camera level first, then move
The single fastest way to eliminate perspective distortion is to lock the camera level with the floor plane. No upward tilt to grab extra ceiling height. No downward tilt to exaggerate floor space. Just a clean, neutral horizon.
A field-tested routine works every time:
- Mount the camera on a tripod or a well-balanced gimbal with a leveling base.
- Use the camera’s built-in electronic level—or a bubble level on the head—to set the horizon precisely.
- Adjust camera height to the room’s natural eye line before touching tilt controls.
- If the frame feels too tight, move the camera backward or select a moderately wider focal length—always preserving level orientation.
This approach keeps verticals running true. Molding, window casings, and doorframes remain parallel to the frame edges, which subconsciously signals to the viewer that the architecture is solid and accurately represented. When I review dailies on a larger monitor, I check the outermost verticals first. If they’re straight, the rest of the room usually falls into place.
Camera height: the overlooked fix
Many distorted interior shots aren’t really lens problems—they’re height problems. A camera set too low exaggerates foreground furniture, making sofas feel heavy and walls oppressive. Too high, and the room flattens into a diagram, losing depth and warmth.
A reliable starting point is chest to eye level, adjusted for the story the room tells. In a kitchen, I might set height so the island reads clearly in relation to the cabinets behind it—neither dominating the foreground nor disappearing. In a living room, a slightly lower position can emphasize ceiling height and natural light, but only if verticals remain controlled.
A quick mental checklist I run on set:
- If a countertop fills too much of the lower third, raise the camera a few inches.
- If the ceiling line seems to press down from the top edge, lower the tripod or reduce any residual tilt.
- If the whole room feels flat and dimensionless, shift the camera position laterally before reaching for a wider lens.
These adjustments seem minor, but together they shape the viewer’s spatial perception. The goal is to place the audience inside the room, not to make them aware of the camera’s presence.
How to avoid bent walls and curved doorframes
Even with a high-quality rectilinear lens, distortion can creep in when straight architectural lines drift too close to the frame’s edge. Ultra-wides map the world onto a flat sensor, and the image circle’s outer perimeter is where stretching becomes most aggressive. The center can look fine, but a doorframe near the side may bow like a parenthesis.
To keep walls and woodwork honest:
- Position critical vertical elements—doorways, window frames, cabinet edges—away from the extreme borders of the frame.
- Avoid placing a door jamb exactly at the frame edge if you need it to read as straight; even a slight inward shift helps.
- Use the center of the frame for structural anchors: fireplace openings, island edges, window mullions.
- Reposition the camera rather than counting on post distortion correction to rescue a poorly framed shot.
I’ll often do a quick pan and scan with my eye before rolling: watch how the nearest vertical behaves as I compose. If it bends at 16mm but straightens at 20mm, I’ll choose the longer focal length and step back. That trade-off—slightly less coverage for significantly truer lines—is almost always worth making.
Choosing the right lens type
For architectural interiors, rectilinear wide-angle lenses are the standard for good reason. Their optical design works to keep straight lines straight, which is exactly what walls, baseboards, and cabinetry demand. A well-corrected 16-35mm zoom or a prime in that range will render trim and molding with the precision the room deserves.
Fisheye lenses have no place in standard listing work. Their characteristic barrel distortion creates a circular, bubble-like curvature that reads as aggressively stylized. While that look might suit an experimental short film, it erodes trust in a property video. Buyers want to understand the space, not admire lens character.
A dependable interior lens should deliver several things simultaneously:
- Controlled barrel distortion at the wide end, so lines near the edges don’t require heavy post correction.
- Decent corner sharpness, since architectural details often live at the periphery of the frame.
- Predictable focus behavior during camera movement, essential for walk-through shots on a gimbal.
- Good low-light performance, because interiors rarely offer enough natural illumination without supplementary light.
In practice, I lean on lenses that I’ve tested in real rooms: I’ll shoot a tiled bathroom, a kitchen with pronounced cabinet lines, and a hallway with strong verticals, then review the footage at full resolution. A lens that passes those three tests earns a place in my kit.
Shooting workflow that keeps space believable
A clean interior video doesn’t start with editing finesse—it starts before the record button is pressed. I’ve developed a disciplined on-set sequence that minimizes distortion from the first frame, saving hours of corrective warping later.
Step-by-step shooting process
- Walk the room and identify the dominant architectural lines: ceiling beams, window arrays, wall junctions, and any hero features like a fireplace or built-in shelving.
- Determine what the space should communicate—airiness, warmth, flow, or functional clarity—and let that inform focal length and composition.
- Mount the camera and level it carefully, using both the tripod head and the camera’s internal level.
- Select a wide but not extreme focal length based on the room’s scale and the table earlier.
- Set camera height to a natural, room-appropriate eye line.
- Check the frame edges for any warping, leaning, or bowing of architectural elements before rolling.
- Reposition the camera or adjust focal length if edge distortion is visible, rather than counting on post-production fixes.
- Record a short test clip and review it on a field monitor or larger screen—phone screens are too small to catch subtle perspective issues.
This sequence isn’t just about technical purity. It’s about respecting the architecture. When I spend an extra three minutes leveling and checking edges, the final edit flows more naturally, and the rooms feel cohesive rather than pieced together from mismatched perspectives.
Editing corrections: useful, but limited
Post-production correction has its place. Lens profiles can tame mild barrel distortion, and perspective sliders can nudge verticals back to plumb. But I treat these tools as refinement instruments, not rescue operations.
Use post correction for:
- Subtle barrel distortion that remains even with a good rectilinear lens.
- Small perspective tweaks—fractions of a degree—to true up vertical lines.
- Slight horizon leveling when the camera was off by a hair.
- Applying lens-specific profiles that map the optical characteristics of your glass.
Do not rely on post correction to fix:
- A shot tilted aggressively up or down, which will require heavy warping and crop.
- Severe corner stretching from an ultra-wide lens used too close to subject.
- A focal length that was fundamentally wrong for the room size.
- Compositional errors driven by rushed or careless camera placement.
Every degree of digital correction costs you resolution and introduces minor interpolation artifacts. The cleaner the source footage, the more transparent the final video becomes. I’d rather move the tripod two feet backward on set than spend twenty minutes in post trying to un-distort a shot that was never going to work.
Common mistakes that distort interior space
- Shooting excessively wide because it feels like the only way to “fit everything in” — the room ends up looking cavernous and disorienting.
- Tilting the camera upward to capture more ceiling, which collapses verticals inward like a pyramid.
- Placing the camera too low, near furniture height, exaggerating foreground bulk and making the space feel heavy.
- Using fisheye or heavily curved optics for standard listing footage, which breaks the illusion of an accurate walkthrough.
- Positioning walls, cabinets, or trim right at the frame borders where distortion is most pronounced.
- Depending on distortion correction in post to salvage a fundamentally flawed setup—software can’t fully restore what the lens and position already compromised.
Quick checklist before recording
- Camera is leveled horizontally and vertically.
- Vertical lines—doorframes, window edges, cabinet ends—appear straight in the monitor.
- Lens choice suits the room’s dimensions without extreme stretching or cramping.
- Important architectural elements are not pinned against the frame edge.
- Camera height reads as natural and appropriate to the space.
- No obvious bowing in trim, baseboards, or door casings.
- Post correction will be light and supplementary, not heavy and structural.
Best practices by room type
| Room type | What to prioritize | Main distortion risk |
|---|---|---|
| Small bathroom | Apparent spaciousness without exaggeration | Curved walls and stretched vanity edges from extreme wide angles |
| Kitchen | Straight cabinet lines and level countertops | Bent lines at frame edges where cabinetry meets the image border |
| Living room | Balanced width and natural depth | Overwide “fishbowl” effect that makes the room feel like a stage set |
| Bedroom | Comfort, intimacy, and proportional scale | Making the room feel smaller than it is through poor lens choice or height |
| Hallway | Clean verticals and stable, level movement | Leaning walls from even slight camera tilt during motion |
When distortion is acceptable
Absolute neutrality isn’t always the goal. A modest amount of wide-angle expansion can help a compact room feel open and usable—especially in bathrooms, powder rooms, or narrow hallways where spatial perception directly impacts the viewer’s impression. The key is intentional control: the lens should whisper, not shout.
The line I draw is simple. If someone watching the video notices the lens before the room, I’ve gone too far. Slight spatial enhancement is part of the craft, but when doorframes curve and ceilings feel like domes, we’ve left real estate cinematography and entered optical experimentation. The room should feel like itself—just the most flattering, honest version of itself.
FAQ
What lens is best for filming real estate interiors?
A rectilinear wide-angle in the 16–24mm full-frame equivalent range is a solid, versatile starting point for most interior scenarios. It balances spatial coverage with geometric control.
How do I keep vertical lines straight in interior video?
Keep the camera level, avoid tilting up or down, and verify alignment with a tripod-mounted bubble level or the camera’s electronic level. Even half a degree of tilt can visibly skew doorframes and wall edges.
Should I use a fisheye lens for real estate video?
Not for standard property work. Fisheye optics introduce pronounced curvature that makes interiors look unnatural and undermines the video’s credibility. Reserve them for creative, non-listing projects.
Can I fix distortion in editing?
Mild distortion—especially lens barrel correction and micro-adjustments to perspective—can be cleaned up in post. But major geometric problems, like severely converging verticals, are far better addressed during the shoot itself.
What is the biggest mistake in filming interiors?
Tilting the camera to force more room into the frame. It’s the most common shortcut, and it consistently produces leaning walls and a sense that the space is physically unstable.
Final takeaway
Filming interiors without distorting the space isn’t about owning the most expensive lens—it’s about discipline. Keep the camera level. Choose a wide but controlled focal length that respects the room’s proportions. Compose from a height that feels natural and human. When the shot looks correct in-camera, with verticals running true and edges free of warping, the final edit becomes an exercise in refinement rather than repair. The room will feel like itself, and that authenticity is what connects a viewer to a space.