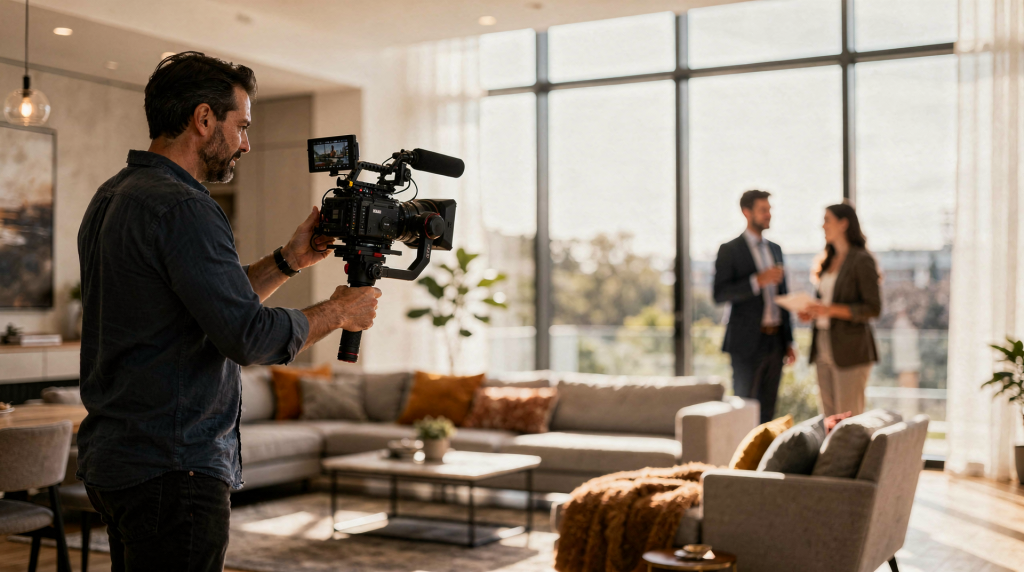
When I walk onto a property, I’m not looking at walls and square footage — I’m watching how light carves out textures, how a hallway compresses and releases, and what kind of rhythm the floor plan suggests. A cinematic real estate shoot is never about simply documenting rooms. It’s about choreographing perception: every frame, every move, every shadow has to make the space feel intentional and emotionally rich. The best work comes from blending architecture-aware composition, disciplined lighting, and movement that reveals a home’s flow without the viewer ever feeling rushed or manipulated.
Why a cinematic real estate video is different
A standard listing video catalogs rooms. A cinematic film tells the story of how those rooms relate — how morning light travels from the breakfast nook into the kitchen, how the staircase draws the eye upward, what kind of life the space suggests even before anyone moves in. That means the shoot has to be treated as a focused production, not a casual walkthrough. I plan my shots to convey a sequence of emotional cues, not just a checklist of features.
In practical terms, the final edit usually lives across several formats: a polished horizontal version for the MLS or high-end website, plus vertical cutdowns for Instagram Reels and TikTok. So every decision on set — composition, camera height, movement — has to support multiple deliverables without boxing me into one framing. I’ll often frame a bit wider than the horizontal hero shot to leave safe area for a 9:16 crop, or shoot a static insert purely for the vertical edit.
Pre-production: where the shoot is won
I’ve learned that the most efficient shoots happen long before I unzip the camera bag. Real preparation grounds the creative work and prevents the kind of scrambling that kills atmosphere on set.
What to confirm before shoot day
- Property access and key handoff — who meets me, codes, gate access.
- Cleanliness and staging level — is furniture dressed, or will I be moving items?
- Optimal time of day for interior and exterior light — I map sun position relative to key windows.
- Window views and direction of sunlight — knowing where the afternoon glare hits lets me schedule rooms.
- Expected deliverables: MLS listing film, website hero, social cutdowns, agent intro/outro.
- Restrictions: drone flying permissions, HOA rules, sensitive neighbors, fragile flooring.
This prep pass eliminates two classic time-wasters: adjusting staging on the clock and losing great light to surprise contrast issues. I’ve seen shoots derailed by a single window that wasn’t scouted, so I always ask the agent for a quick FaceTime walkthrough if I can’t visit beforehand.
The shot list should follow the space
I stopped building shot lists room by room years ago. Instead, I structure the list around narrative flow — the same way an editor stitches a scene. It typically looks like:
- Entry sequence: door, threshold, first interior reveal
- Main living areas: volume, connection to outdoors, light quality
- Kitchen and dining connection: how they relate, sight lines
- Primary suite and bath: privacy, materials, atmosphere
- Secondary spaces or lifestyle features: office nook, library, wine cellar
- Exterior and neighborhood context: street presence, landscaping, drone establishing shot
That sequence mirrors how a buyer’s eye naturally explores, and it gives the edit a built-in dramatic arc — introduction, discovery, detail, and resolution.
How to light interiors without making them look artificial
Lighting is where most average real estate video completely falls apart. Walk into a room, blast it with 5600K LED panels, and suddenly a charming Craftsman bungalow looks like a hospital corridor. The real goal is balance: augment natural ambient light just enough to lift shadows and define materials, while keeping the room’s authentic mood intact.
A simple interior lighting approach
- Start with natural light: open blinds fully and evaluate exposure. I often shoot a test clip to see where the shadows fall.
- Turn off distracting mixed-color practicals first — tungsten bulbs fighting daylight kill any chance of a consistent grade.
- Use bounce or reflected light instead of hard direct light. Even a simple 5‑in‑1 reflector can wrap fill into a dark corner without hotspots.
- Match the room’s color temperature as closely as possible. If daylight is dominant, I gel my warm LEDs to 5600K or use bi‑color panels tuned precisely.
- Protect window highlight detail: expose for the interior but watch the waveform so the outside doesn’t clip completely. Sometimes I’ll double‑take with a lower exposure for the windows if the view is a selling point.
In luxury properties with rich materials — matte stone, raw timber, brushed brass — indirect fill is essential. Bouncing a soft light off the ceiling or a side wall reveals texture without burning out wood grain or creating shiny reflections on polished surfaces. I’ll often position a small LED panel on a floor stand aimed into a white corner to create a soft, source-less glow.
Common lighting mistakes
| Mistake | Why it hurts the video | Better approach |
|---|---|---|
| Overlighting every room | Eliminates depth and mood; the home feels sterile and flat | Add just enough fill to hold detail in shadows, let contrast shape the space |
| Mixing warm and cool light | Color inconsistency forces a messy grade and breaks immersion | Decide on a dominant temperature and control or replace off‑color lamps |
| Ignoring windows | Exterior blows out to white, losing the connection to the outside | Expose for the interior, check zebras, and consider shooting closer to golden hour |
| Hard light on reflective surfaces | Causes fixtures, glare, and unnatural hotspots that draw the eye in the wrong way | Angle lights away from glossy surfaces and use soft diffusion; feather the light off mirrors and glass |
Camera movement in tight spaces
Movement is where the viewer feels whether the operator understands the floor plan. In compact rooms, the camera should breathe with the architecture — not fight it. I constantly ask myself: “Does this move reveal something new, or is it just motion for motion’s sake?”
What works best in confined rooms
- Subtle push-ins that create depth — moving slowly toward a window or a fireplace builds anticipation.
- Slow lateral slides to reveal layout — a slider shot traveling along a kitchen island shows the workflow without cutting.
- Gentle pivots that connect one room to the next — a smooth pan from the dining area into the living space keeps the edit fluid.
- Controlled walk-throughs with stabilized movement — I use a gimbal set to a mild follow mode so footsteps feel weightless.
- Small reframes that emphasize width or ceiling height — a tiny upward tilt in a hallway can completely change the perception of volume.
When dealing with a narrow corridor or a powder room, I often lean on a 24‑35mm lens instead of an ultra‑wide to avoid distorting lines, and I keep the camera on a slider rather than a gimbal. A 12‑inch lateral slide across a vanity reveals the space cleanly without the wobble that can creep in when walking backward.
Why small moves often look better
A subtle shift in perspective can show how a room opens up, reveal a sight line through to the terrace, or connect two areas in one fluid motion. In tight environments, that restrained gesture often feels far more cinematic than any sweeping arc. I think of it as the camera being a curious guest rather than a tour guide on fast‑forward.
Building a cinematic sequence room by room
A strong real estate film isn’t a gallery of disconnected angles; it’s a visual journey that mimics the experience of walking through the home with fresh eyes. I sequence my shots to build emotional momentum and spatial logic.
Recommended sequence
- Establish the setting with an exterior detail — drone shot, street view, or a slow reveal of the facade.
- Introduce the entry and first impression — the front door opening, the immediate sight line into the foyer.
- Move into the main living area — emphasize volume, light, and the connection to outdoor spaces.
- Connect the kitchen, dining, and gathering zones — show how the floor plan encourages flow.
- Transition to private spaces — primary bedroom, en‑suite bath, closets, with attention to material details.
- Finish with lifestyle vignettes and a hero shot — a pool at dusk, a cozy reading nook, a twilight exterior with warm windows lit from inside.
Useful coverage to capture in each area
- A wide shot for spatial context
- A medium shot that clarifies layout and furniture relationships
- A detail shot emphasizing materials and craftsmanship — door handles, stone veining, millwork
- A movement shot that reveals flow — slider, gimbal, or subtle dolly
- A static hold to give the editor breathing room and support social cutdowns
The crew’s behind‑the‑scenes reality
What makes a cinematic property film feel polished is often invisible: a compact rig, quick resets, and a team that respects the home as if it were a museum. Even on a two‑person shoot, the backstage coordination is what keeps the bullet train on the rails.
On‑set priorities that save time
- Keep gear minimal and mobile — a single Pelican case for lenses, one gimbal, one slider, two lights max.
- Reduce unnecessary people in frame — no one wants an assistant’s reflection in a powder room mirror.
- Protect floors, walls, and finishes — I always lay down a moving blanket before repositioning a light stand.
- Reset lights and furniture quickly — I carry a small microfiber cloth to erase fingerprints on brass after moving a table lamp.
- Review footage on set — I’ll punch into the monitor to check focus on a key architecture line or catch a blown window before moving on.
Speed matters because homes have to stay pristine, and seller tolerance for a day‑long production is limited. I design shoots to be done in one disciplined window, often moving room to room as the light travels, so the final delivery stays within a tight turnaround without sacrificing quality.
What clients usually do not see
- Window timings: that perfect soft light in the master suite only lasts 20 minutes before the sun creeps behind a neighboring building.
- Micro‑adjustments: shifting the camera an inch to kill a mirror reflection of a C‑stand that took ten minutes to fine‑tune.
- Multiple passes: repeating a hallway walkthrough five times because a single footstep thud ruins the gimbal’s stabilization.
- Cutdown‑specific takes: recording a vertical‑safe alternate with extra headroom for the Instagram Reel.
- Color‑matching notes: shooting a grey card or ColorChecker in each room to make post‑production seamless across wildly different light conditions.
Post‑production: where the story becomes watchable
The edit is where architecture turns into emotion. I stop thinking about takes and start sculpting a rhythm that respects both the property and the viewer’s attention span.
Editing choices that matter
- Keep pacing confident but unhurried — let the home breathe; no one needs a cut every second.
- Avoid overusing fast transitions — whip pans and zooms rarely serve the architecture; they distract from space.
- Match movement direction between shots whenever possible — a gentle pan right should connect to another frame that continues that vector.
- Let hero shots land — hold on the fireplace with shifting light or the kitchen island detail for a beat longer than expected.
- Music should support the tone of the home, not hijack it. A mid‑century modern deserves a warm, textural score, not generic corporate hype.
For real estate marketing, I always deliver a short, punchy vertical version alongside the main horizontal film. The social cutdown grabs attention in the first 1.5 seconds, often starting with the strongest exterior drone shot or a dramatic interior reveal.
Color and sound are part of the pitch
Color grading should make the home feel accurate — enhanced but not a fantasy. I match white balance across rooms, pull a gentle S‑curve for contrast, and lift shadows just enough to reveal texture in dark wood. The grade has to feel invisible, like the property is naturally lit by perfect daylight even if it was shot at noon with fill. Sound design, even without dialogue, shapes perceived value. I layer a quiet room tone under the music, add subtle ambient details (birdsong outside an open window, the soft hum of a kitchen hood), and crossfade tracks to match the architectural mood. It’s the difference between a video that feels hollow and one that feels inhabited.
Typical mistakes that weaken a cinematic real estate shoot
- Shooting every room from the same height and angle — the home becomes a flat plan, not a three‑dimensional experience.
- Using too many whip pans or fast transitions — they fracture spatial continuity and confuse the viewer.
- Ignoring mixed lighting — leaving warm table lamps on in a daylight scene guarantees ugly orange highlights.
- Overstaging the home until it feels unnatural — a kitchen counter with a single, perfectly placed apple screams “set dressing” and breaks trust.
- Cutting the story too quickly — the viewer never gets oriented, and no room makes an impression.
- Forgetting to capture vertical versions or leaving no safe area — a beautiful horizontal composition may crop disastrously on a phone screen.
But the greatest mistake I see is treating the home like a generic container. Every property has a distinct rhythm — a 1920s Spanish Revival moves slower and asks for attention to terracotta tones and heavy wood beams; a glass‑walled contemporary loft demands sharp, clean lines and fluid gimbal motion that highlights transparency. Shooting without sensing that underlying character reduces the film to a brochure.
BTS checklist for a smoother shoot
- Confirm access, staging, and timing the day before
- Walk the property once with only your eyes — no gear — to absorb the light and sequence
- Choose a room order based on sun path and narrative flow
- Decide which practical lights stay on and which get shut off; replace bulbs if necessary
- Capture wide, medium, detail, and movement coverage in every key area
- Shoot a grey card or white balance reference in each major space
- Review critical clips at 1:1 zoom before packing up
- Deliver multi‑platform exports: a master horizontal, a 1:1 square cut, and a vertical social edit
Project takeaway
A cinematic real estate video shoot succeeds when it makes architecture feel lived in, legible, and emotionally resonant. The polish doesn’t come from fancy gear — it comes from deliberate prep, honest lighting that cooperates with the space, movement that serves the floor plan, and editing that respects both the home and the human watching. When those elements align, the final piece stops being a walkthrough and becomes an invitation.
FAQ
What makes a real estate video feel cinematic?
It’s the combination of intentional framing, controlled lighting that preserves atmosphere, smooth motion motivated by the architecture, and a clear narrative sequence. The viewer isn’t just touring — they’re being guided through an emotional experience where each room reveals something meaningful.
How long should a cinematic property video be?
For the main listing, I usually aim between 60 and 90 seconds — long enough to tell a story, short enough to hold attention. Separate vertical variations often run 15–30 seconds, pulling the strongest moments from the same shoot.
What is the best camera movement for small rooms?
Slow push-ins, subtle lateral slides, and gentle pivots work best. They reveal space without making it feel cramped. I avoid walking backward with a gimbal in tight areas because even minor footsteps can translate into vertical bumps that ruin the sense of weightlessness.
How do you light a home so it still looks natural?
I use natural light as the foundation, then add soft fill only where shadows lose detail. Hard direct light is avoided; instead, I bounce or diffuse. Keeping the color temperature unified — usually matching the dominant daylight — is critical. The result feels like a particularly beautiful day, not a studio set.
What should be on a real estate video shoot checklist?
Access logistics, staging readiness, sun timing and window orientation, a room sequence based on light, confirmation of deliverables, gear backup, and contingency plans for reflective surfaces, weather, or restricted flight zones. The checklist is as much about protecting the home’s condition as it is about saving production time.