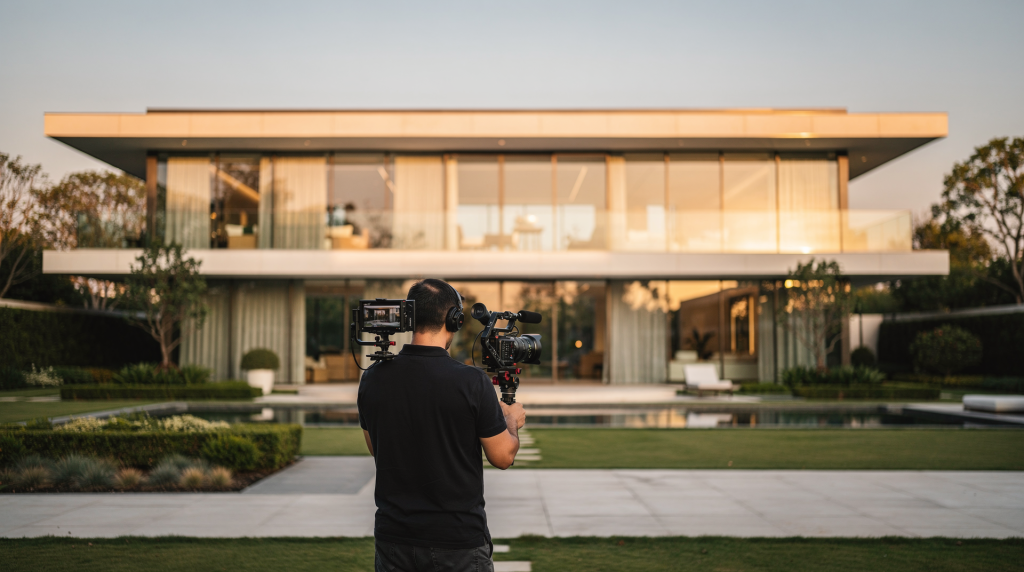
A luxury real estate video that actually works isn’t a documentation of square metres — it’s a visual narrative. When I set out to film a property, I’m not thinking about coverage. I’m thinking about how the space will make someone feel long after they’ve closed the browser tab. The images need to convey not only layout and finish, but volume, texture, and the way light falls across a room at a particular time of day. That’s what turns a listing into a memory.
Over years of shooting high‑end architecture and interiors, I’ve learned that the gap between a decent walkthrough and a truly cinematic video comes down to discipline: disciplined motion, disciplined light, and a disciplined cut. You’re not showing everything — you’re selecting the moments that build desire. And the tools don’t matter as much as the decisions behind them.
What Makes a Luxury Real Estate Video Feel Cinematic
Luxury property videos work best when they balance three things: motion, light, and rhythm. Slow, controlled camera movement signals that the home is calm and premium — it gives the viewer permission to linger. Natural‑looking lighting keeps materials and finishes believable, making marble feel like marble, not like a blown‑out white shape. Editing rhythm provides enough time to absorb each room without boredom; it’s the breath between shots that creates sophistication.
A cinematic approach typically includes:
- a strong opening exterior or neighbourhood shot that anchors the property in its context
- smooth interior movement through key spaces, rarely revealing the whole room at once
- detail shots that justify the price point — door hardware, stone veining, custom joinery
- lifestyle inserts that suggest how the home is lived in, without feeling like actors on a set
- a polished colour grade that feels clean and neutral, not overprocessed
The mistake many creators make is trying to show everything. Luxury videos perform better when they reveal the property strategically, giving the viewer a reason to keep watching and, ideally, to schedule a private showing.
Pre-Production: Plan the Story Before You Shoot
A cinematic video starts long before the camera rolls. I always walk the property twice: first with a notebook, then with a light meter and a director’s eye. The goal is to decide what the story should be. Is this home about architecture — a sculptural staircase, a cantilevered roof — or about ocean views, entertaining, absolute privacy, or a curated collection of materials and textures? That answer shapes the shot list, and every frame serves that idea.
Without a story, the edit becomes a slideshow. With one, the camera moves with purpose, revealing the property as a series of experiences rather than a checklist of rooms.
Build a simple narrative arc
A good luxury real estate video often follows this structure:
- Exterior or arrival sequence
- Entry and first impression
- Main living spaces
- Kitchen and entertaining areas
- Primary suite and signature amenities
- Outdoor living
- Closing hero shot
This order gives the viewer a sense of progression. It mimics how a buyer experiences a property in person: the curb appeal, the threshold, the heart of the home, the private retreat, and finally the lifestyle that waits outside. When I plan a shoot, I walk this path physically and note where the light hits and where the eye naturally travels.
Create a shot list by function
Instead of listing every room randomly, I group shots by purpose:
- establishing shots
- transition shots (doorways, corridors, reveals through glass)
- wide room reveals
- detail inserts
- lifestyle moments
- closing visuals (the view, the entrance at dusk, the pool)
That approach keeps the edit coherent and avoids repetitive coverage. It also forces me to think about how one shot hands off to the next. For example, a slider move across a living room might end on a hallway that becomes the opening of the next scene — coherence in motion, not just content.
Preparing the Property for Camera
Even the best camera work cannot hide clutter, poor lighting, or bad staging. Luxury homes need to feel refined in frame, so preparation is as critical as filming. I’ve walked into seven‑figure properties where a misplaced remote control or a tangle of cables under a desk pulled the eye away from a beautifully lit interior. Small distractions feel larger on camera, especially when the rest of the frame is intentional.
Property prep checklist:
- Open every curtain and blind; even partially closed treatments create dark, unflattering verticals.
- Turn on all interior lights — they add depth and liveliness, especially on overcast days.
- Remove clutter, cords, toiletries, and kitchen distractions.
- Straighten pillows, chairs, and decor; symmetry often reads better on screen.
- Wipe reflective surfaces — fingerprints on a rangetop or mirror are magnified in 4K.
- Check mirrors for crew reflections; sometimes a slight adjustment saves hours in post.
- Stage key areas with restraint, not excess — one statement object often works harder than a dozen small ones.
- Confirm that outdoor spaces are clean and balanced; dead leaves on a walnut deck kill the premium feel.
In high‑end homes, a stray cable or an open cabinet can weaken an entire sequence. I always budget a solid 30–45 minutes just for the final walk‑through, looking at each frame as if I were the buyer.
Choosing the Right Time of Day
Light changes everything in real estate cinematography. Daylight gives interiors depth and realism, but the best time depends on what you want the viewer to feel. I plan my day around the sun — shooting exteriors when the light is directional and interiors when the windows are balanced with the interior ambient.
| Scene type | Best time | Why it works |
|---|---|---|
| Светлые интерьеры | Позднее утро – ранний день | Помещения остаются открытыми, свет мягко заполняет пространство |
| Комнаты с акцентом на вид | Когда внешний свет сбалансирован | Сохраняет вид и предотвращает пересветы за окном |
| Западные фасады | Золотой час | Добавляет теплоту и объём |
| Премиальные экстерьеры с подсветкой | Сумерки | Создаёт эмоциональный, богатый финал |
| Бассейны, террасы, зоны отдыха | Поздний день или закат | Делает пространство особенно желанным |
Twilight is especially effective for luxury listings because illuminated interiors and exteriors create contrast, warmth, and emotional appeal. I often schedule the pool deck or the front entrance with landscape lighting exactly 20 minutes after sunset — that window of deep blue in the sky combined with warm 3000K‑ish interior spill is one of the strongest tools for premium properties when the architecture and landscaping support it.
Camera Settings That Support a Cinematic Look
A cinematic result depends on consistency. The biggest technical mistake I see is relying too much on auto settings — exposure bouncing, colour shifting, sharpness varying from room to room. All of that makes a video feel amateur, no matter how beautiful the property.
Practical camera baseline
- Shoot at 24 fps for a classic cinematic feel; 25 fps for PAL regions if needed.
- Use a shutter speed near double the frame rate — 1/50 for 24 fps — to keep motion blur natural.
- Keep ISO as low as possible to preserve clean image quality and texture in materials like marble and wood.
- Set white balance manually for each lighting environment; a quick white card or grey card reference at the start of each room saves massive time in colour grading.
- Use a mid‑range aperture — usually f/5.6 to f/8 on full‑frame — that keeps most of the room in focus without causing diffraction. Luxury real estate is not the place for heavy background blur. Buyers need context; they want to see the relationship between spaces, not a bokeh competition.
White balance matters more than many creators think
If one room looks warm, another looks blue, and a third shifts green, the video immediately feels less premium. I lock white balance manually so walls, wood tones, and fabrics remain consistent across the whole property. In practice, I bring a small bi‑colour LED to quickly balance mixed environments — say, daylight from a window and warm downlights in a kitchen. Flick the light to match the dominant source, set the camera, and move on. Consistency here is the invisible glue of a polished edit.
Camera Movement in Tight Spaces
Luxury homes often have elegant proportions, but many rooms still feel tight once equipment is inside. The solution isn’t faster movement — it’s cleaner, slower movement. I’ve done shoots in 800‑square‑foot penthouses that felt spacious on screen simply because the camera never hurried.
Effective movement styles
- slow push‑ins to introduce a feature, like a freestanding tub against a marble accent wall
- gentle pull‑outs to reveal scale — pulling back from a dining table to show the adjacent terrace
- horizontal slides to show width, especially across kitchen islands or wardrobe cabinetry
- subtle reveal shots through doorways or hallways, where the camera peeks and then slides in
- controlled orbit shots around an island or table, keeping the subject at a constant distance
Movement should feel intentional, not decorative. Every move should answer a question: what does this reveal that the last shot did not?
A few movement rules that help
- Keep the pace slow enough for viewers to process the space — typically faster than a stroll but slower than a panicked search.
- Maintain a stable camera height across the sequence, usually around chest level; this avoids the jarring feeling of suddenly being taller or shorter between rooms.
- Avoid sudden direction changes.
- Use movement to lead the eye, not to impress.
In luxury interiors, calm motion feels more expensive than aggressive motion. A smooth slider draw across a living room does more for perceived value than a quick gimbal whip through a corridor.
Lighting Interiors for a High-End Look
Natural light should be your first source whenever possible. It gives interiors realism and depth. Then I shape the room so it looks balanced on camera, not flat. Typically, I’ll expose for the light entering the room and then gently lift shadow areas with practical lamps or a small LED panel bounced off a ceiling.
Interior lighting priorities
- Open windows and blinds fully.
- Use practical lights like table lamps and sconces — they add warmth and dimension without looking artificial.
- Add supplemental LED only where needed, such as in a dark corner that would otherwise fall to black.
- Avoid mixing too many colour temperatures in one room; when I have to blend, I modify one source with gel rather than leaving it mismatched.
- Reduce harsh shadows in dark corners by bouncing a small light off a white ceiling or reflector.
The goal is not to make every room unnaturally bright. It’s to make the image feel clean, dimensional, and believable. I often underexpose a room by half a stop to preserve window detail, then bring up the interior in post — having a camera with good dynamic range makes this a reliable technique.
Common lighting mistakes
- Leaving windows too bright and featureless — losing the view that’s part of the property’s value.
- Mixing warm lamps with cool daylight without control.
- Using too much artificial fill; when the room looks lit by a ring light, it stops feeling like a luxury home.
- Flattening the room so it loses texture — side light, even from a window, creates micro‑shadows that reveal materials.
- Ignoring reflective surfaces like marble, glass, or polished concrete; they require careful placement of lights to avoid hotspots.
Luxury homes often have valuable finishes that look best when they keep some depth. Overlighting can make premium materials feel cheap, as if shot in a showroom warehouse.
What Shots Matter Most in a Luxury Listing Video
Not every room deserves the same screen time. A cinematic edit should emphasise what gives the property identity. I often cut a bedroom down to two shots — a wide from the doorway and a detail of the window treatment — if the real story is in the living area and the view. The viewer needs to remember three things about the home; the edit should serve those three things.
Priority shot types
- front elevation or gated arrival — the first frame often defines expectation
- foyer reveal — the moment where the camera crosses the threshold, often with a smooth slider push
- main living area with a clean hero angle that shows volume and connection to outdoors
- kitchen with island and custom finishes, captured from a corner to reveal depth
- primary suite with natural light; soft, airy coverage feels more expensive
- spa bathroom or dressing room — let mirrors and glossy surfaces work for the camera
- outdoor terrace, pool, or view corridor — ideally at golden hour or twilight
- signature amenity such as wine room, theatre, gym, or library — the unexpected space that sets the listing apart
Detail shots that add value
- hardware and fixtures — solid, well‑finished metal suggests quality
- custom millwork — shadows on cabinet profiles reveal craftsmanship
- stone veining — close‑ups of marble waterfall edges make the material tangible
- textured walls or specialty lighting — a plaster finish or a designer sconce deserves a slow pan
- window lines and view frames — let the view appear as part of the composition, not just a bright void
- designer furniture and architectural accents — only if they enhance the narrative, not distract
Detail shots should support the larger story, not interrupt it. I usually place them between wider shots, giving the eye a moment to rest before the next reveal.
Editing for Pace, Clarity, and Emotion
Editing is where a good shoot becomes a premium video. The cut should guide attention, create rhythm, and keep the viewer emotionally engaged. I think of the edit as a score: the first beat establishes expectation, the middle builds curiosity, and the final image leaves a lasting impression.
A strong edit usually has:
- clean transitions between spaces — often a short cross‑dissolve or a hard cut on matching motion
- consistent motion direction; if a slider moved left to right in the kitchen, the next shot shouldn’t fight that direction
- limited repetition — one wide, one detail, then move on
- longer holds on important reveals — a view deserves 4–5 seconds, not 2
- short detail inserts placed strategically, like punctuation
- music that supports the mood without overpowering it; a low‑frequency bed with subtle movement works better than a soaring orchestral track that distracts from the space
A luxury video doesn’t need constant energy. Restraint usually feels more sophisticated.
Editing checklist
- Remove any shot that repeats information.
- Make sure each cut advances the story — if you’re cutting back to the same room, ask why.
- Match movement direction where possible.
- Use transition shots to connect rooms smoothly; a 3‑second glide along a corridor does wonders.
- Keep the colour grade consistent across all scenes.
- Balance beauty shots with practical coverage — enough to sell the layout, not just the decoration.
If a shot does not improve understanding or mood, cut it, no matter how beautifully it was lit.
Color Grading: Keep It Premium, Not Heavy
Luxury real estate videos benefit from a clean, natural grade. Over‑saturation, crushed shadows, and overly dramatic contrast can make even beautiful homes feel artificial. I approach grading like I’m developing film — the goal is to let the materials speak, not to impose a look.
Good grading goals
- neutral whites — walls and ceilings should read as clean, not tinted cold blue or warm yellow
- accurate wood tones — walnut should feel like walnut, oak like oak
- controlled highlights — window views should retain detail, even if slightly compressed
- rich but believable contrast — a gentle S‑curve that preserves shadow texture
- polished skin tones if people appear on camera — even brief lifestyle moments need natural colour
A premium grade should feel invisible. The viewer should notice the home, not the edit. If someone asks “what LUT did you use?” you’ve probably gone too far.
Should You Include Lifestyle Footage?
Yes, if it supports the property. Lifestyle clips help viewers imagine daily life in the space, but they should feel subtle and authentic. I usually shoot these moments as if they were out‑takes from a documentary — no direct eye contact with the lens, natural movement, soft focus on the background.
Good lifestyle inserts
- coffee on a terrace — steam rising, a momentary pause
- sunlight across a breakfast table — the light itself becomes the character
- a pool reflected at dusk — no one needs to be swimming; the water surface tells the story
- fire lit in a living room — the flicker adds organic movement
- wine being poured in an entertaining area — glass, liquid, and soft ambient sound (even if music replaces it)
- a person opening the doors to a view — the act of revealing, not performing
These moments work best when they reinforce the home’s identity. They should never feel staged in a way that breaks realism. I avoid wide smiles or over‑rehearsed actions; a candid glance toward the window works harder than a scripted line.
Deliverables for Modern Luxury Listings
High‑end real estate videos rarely work as a single master edit. A 90‑second hero piece is essential, but agents also need vertical cuts for Instagram Stories, teasers for TikTok, and sometimes location‑only clips. Planning for multiple deliverables early saves time in post‑production and ensures the shoot covers every format properly.
Common deliverables:
- horizontal hero film for website and MLS — usually 90–120 seconds
- vertical cutdowns for social media — 15–30 seconds, re‑framed to 9:16
- short teaser version — 15 seconds, often text‑overlay ready
- neighbourhood or location clip — a 30‑second piece that sells the context
- drone‑supported exterior piece — showing lot lines, proximity to amenities
- agent introduction version with voiceover or on‑camera hosting
During the shoot, I’ll capture a few extra takes composed for vertical framing, especially of hero spaces. It takes seconds on set and makes the social edit feel native, not cropped.
Common Mistakes That Make Luxury Videos Feel Cheap
Even good footage can lose its premium feel when the basics are ignored. I’ve seen beautiful homes reduced to generic walk‑throughs because of avoidable errors.
Avoid these mistakes:
- moving the camera too fast — the space needs time to register
- showing clutter or personal items — a family photo on a fridge instantly lowers perceived value
- relying on auto exposure and auto white balance — inconsistency breaks immersion
- using too much shaky handheld movement — unless it’s a highly stylised lifestyle piece, keep the camera stabilised
- skipping exterior context — buyers want to know what the entrance feels like, not just what’s inside
- overusing drone footage without a purpose — a single establishing shot often does the job
- editing too quickly for the room to register — less than two seconds on a wide shot feels frantic
- making the grade too dark or too trendy — a crushed‑black, desaturated look rarely serves the listing’s goal
Luxury buyers are visual connoisseurs. They expect clarity, control, and taste. Even small technical lapses can undermine the trust that the property deserves to command a premium price.
Step-by-Step Workflow for a Cinematic Luxury Real Estate Video
- Scout the property. Identify the hero features, best light sources, and strongest arrival sequence. I take stills at various times to plan the schedule.
- Build the narrative. Decide how the video will open, move through the property, and close. This becomes the spine of the shoot.
- Stage the space. Remove clutter, turn on all lights, and refine the details that will appear on camera. Check reflections and window light.
- Shoot the wide story first. Capture exterior, entry, and room‑reveal shots while the light is best. Wide shots often dictate the lighting setup for details.
- Add detail and lifestyle shots. Film materials, finishes, amenities, and any human moments that support the property’s identity. Work these in around the main light windows.
- Review continuity. Check that movement, exposure, and white balance stay consistent across scenes. A quick field monitor review reveals issues that post can’t fully fix.
- Edit for flow. Cut for progression, not just beauty. Each scene should move the story forward. Watch without music first — the visual rhythm must hold its own.
- Grade lightly. Keep the finish clean, natural, and premium. Match across all shots, and export a reference still to check on multiple displays.
Quick Checklist Before Delivery
- Does the opening immediately establish the property?
- Is the movement smooth and intentional?
- Are the lights balanced from room to room?
- Do the details support the asking price?
- Does the edit feel calm and premium?
- Are all deliverables formatted for the right platforms?
- Does the final film show both architecture and lifestyle, woven together?
FAQ
How long should a luxury real estate video be?
Most premium listing videos work best between 60 and 180 seconds, depending on the size of the property and how much story the home needs. For a urban penthouse, 60–90 seconds often suffices; for a sprawling estate with extensive grounds, up to 3 minutes can feel necessary without overstaying.
Do you need drone footage for every luxury property video?
No. Drone footage helps with scale, lot size, location, and context — but only when it adds real value. A tight urban lot might benefit from a single aerial establishing shot to show proximity to a park; a wide rural estate may need several to communicate the relationship between the house and the land. Use drones purposefully, not because you own one.
What frame rate is best for cinematic real estate video?
A 24 fps workflow is a common choice because it introduces a subtle motion blur that mirrors film, keeping the video cinematic while still feeling natural. If your work is destined for broadcast, 25 fps or 29.97 fps may be required, but the aesthetic target remains the same: controlled motion cadence.
Should a luxury listing video include voiceover?
It can, but voiceover works best when it adds storytelling or context that the visuals alone cannot — for instance, explaining the history of a restoration or the vision behind the architecture. If the images are strong enough, music‑only edits often feel cleaner and more immersive. If you do use voiceover, audition the agent’s delivery: a rushed, salesy tone can instantly cheapen the video.
What is the biggest mistake in luxury property videography?
The most common mistake is rushing the visuals. Luxury homes need space, control, and a slower rhythm so the viewer can actually absorb what makes them special. When the camera moves too quickly, the edit jumps every second, and the light is inconsistent, the property loses its authority. Good luxury videography is as much about what you leave out — both in speed and in content — as what you include.
Final Thoughts
A cinematic luxury real estate video is built on intention. You are not just recording rooms — you are shaping perception, manipulating time and space to create desire. When I look back at my favourite projects, the ones that resonated didn’t have the most expensive gear or the most dramatic lighting. They had a clear point of view, a steady hand, and an edit that let every frame exhale.
When you combine careful planning, refined lighting, smooth movement, and disciplined editing, the property feels larger, more valuable, and more memorable than a floor plan could ever convey. The best luxury videos do one thing especially well: they make the viewer want to step inside and stay awhile. If you can achieve that, you’ve done more than sell a listing — you’ve honoured the architecture itself.